To obtain an excellent cappuccino, you need to start with the correct milk frothing!
Sometimes it seems difficult to find a good coffee and we are unfortunately used to under-extracted or over-extracted espresso and to really poor raw materials.
When it comes to cappuccino, the official Italian breakfast drink, envied and copied all over the world, things don’t get better.
In fact, very often the barista does not know how to use the milk jug or the steam wand, he simply offers warm milk or without cream or worse still uses a dirty steam wand. And if it the steam wand is not cleaned, we can just guess what happens with the remaining parts of the process.
But for every cafè like this, there is one that on the contrary works correctly, with baristas who know exactly what they are doing. So let’s learn to reward this kind of work and activity!
In this article we will therefore discover together what is the correct way to froth milk and what should be the goal!
Let’s start by saying that the final result should be a glossy and elastic cream, without bubbles and at a temperature between 55/60°C.
By following the 5 L rule, we can no longer be wrong:
- Milk
- Jug
- Steam lance
- Processing
- LatteArt
1.Latte
As with everything, if you start with a poor or unsuitable raw material, obtaining the desired result becomes much more difficult.
We also remember that milk is a food and being such it must be treated like any other: preserved appropriately, not cooked over and over again and the used tools should always be clean!
The milk must be:
- Fresh, therefore obviously far from the expiry date and it is preferable if it has undergone processing at lower temperatures;
- Entire, as it will be easier to assemble. There should be about 3.5% fat(35 g/1L) and 3.2% protein(32 g/1L): the former help to create a shiny and elastic cream and make it last over time, while the latter help in the formation of the actual cream, incorporating the hot air;
- Cold, the starting temperature of the milk must not exceed 4°C;
- Fitted, between 55° and 60°C.
It is important to know that milk contains casein, which, combined with the tannin found in coffee, forms casein tannate.
These are big words to say that if the temperature of the milk exceeds 65°C the casein tannate is no longer digestible by our stomach and to put it nicely it makes us go to the bathroom in a hurry!
In fact, I’m sure that at least once after a cappuccino at the cafè you had to run to the bathroom… now you know why! The serving temperature was too high!
The same is also true when we see bubbles on the surface: too much air has been incorporated and the final problem is always the same.
NB. If you want to use vegetable drinks to expand your offer, taste them cold first, then hot and finally with coffee, to make sure that the combination is correct and gives a good result to the taste. After that, rely on professional brands created specifically for cafès!
2. Milk jug
The milk jug, as we can well imagine, is important to obtain our result.
If you don’t use the right tools, as in all professions, you are already at a disadvantage.
The milk jug must have the following characteristics:
- in stainless steel;
- with a firm and comfortable grip;
- with a spout;
- always very cold to be able to whip the best.
Furthermore, a good barista should have several milk jugs, of different sizes, to be able to work correctly, without waste and offering an excellent final product:
- A 75cl milk jug, to be used in the morning for breakfast, when requests are very high;
- Two 50cl milk jugs, to be used when there are still requests for cappuccinos together with some macchiato coffees;
- Two 35cl milk jugs, to be used in the afternoon, when most of the frothed milk is used for macchiato coffees.
Also returning to the previous paragraph, where we talked about the temperatures of the milk, these recommended measures are used precisely to avoid having excess milk.
The milk can be frothed only once, after which the one not poured into the cups must be immediately put back in the fridge to bring it back to the temperature of 4°C, or it must be thrown away, but that would be a real waste!
Reassembling it several times in fact creates bacteria, indigestibility and an unpleasant taste.
The good bartender is the one who knows the turnout of his place, foresees the requests and uses the right tools.
3. Steam wand
I hope this is the norm in every cafè by now, but both before and after frothing, the steam wand must be purged:first to release the condensation created inside, the second to make sure that there are no more milk residues inside the cannula steam, while cleaning it also externally with a soft microfiber cloth.
If you walk into a bar and see a dirty steam wand, please run out! If they don’t wash that let alone everything else!
The second thing is to position it correctly inside the milk jug, which will allow the creation of the vortex and therefore the incorporation of the steam (air) in order to be able to froth our milk in the best possible way.
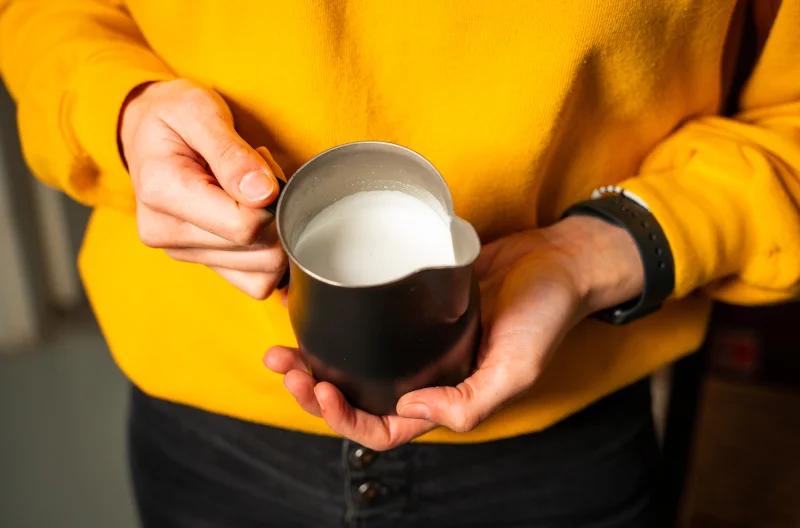
Then pour the milk into the milk jug up to the base of the spout, as in the photo below.

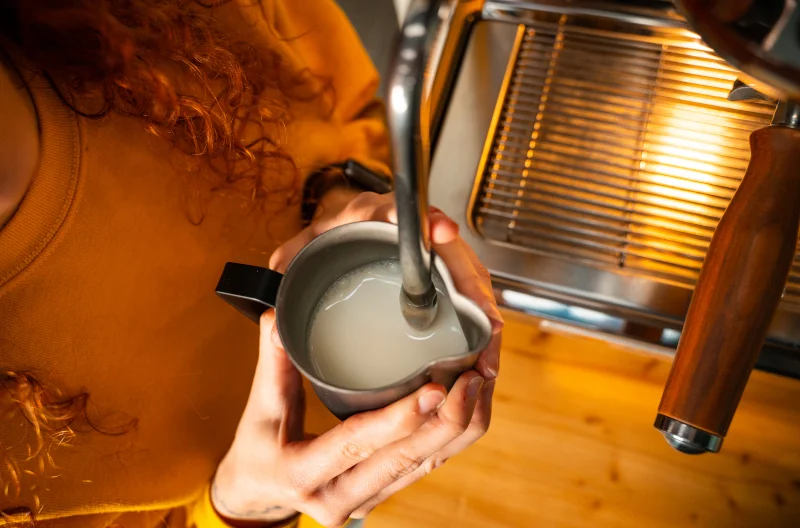
Now position the steam wand: the tip should be just below the surface of the milk, about 0.5cm.
Now imagine it as a cross on the surface of the milk with the two axes intersecting in the centerperpendicularly: the spear must be placed in one of the 4 obtained quadrants.
See the photo below.

4. Processing
During the frothing of the milk we go through several phases:
- Volume phase, is the moment in which the air is being incorporated and the drink increases in volume. The longer the tip of the lance remains on the surface of the milk, the more air will be incorporated and the creamier the milk will become, suitable for example for a Morocchino. On the contrary, if I have to work in Latte Art, a less dense and more elastic cream is needed, so I remain on the surface only for the first few seconds of whipping.
It is important to say that this phase ends when the milk reaches approximately our body temperature, therefore around 37°C. After which the milk itself stops absorbing air, but only ends up reaching temperature.
For this reason, at the beginning of the frothing, the milk must necessarily be cold: if we started from a milk at 20°C, we would have too little time to incorporate the necessary air.
- Emulsion phase, here the spear is now incorporated in the milk which has increased in volume, the still present vortex defines the texture, i.e. the compactness of the cream and the absence of bubbles on the surface. This phase ends when the milk reaches 60°C.
NB. If you are not sure of the correct temperature the first few times, help yourself with a thermometer. But trust that with experience the sensitivity of your hand can fully replace it!
At this point, let the frothed milk rest just long enough to prepare the coffee that we will use as a base.
When the coffee is ready too, we swirl the milk cream on the edge of the milk jug with circular movements, in order to make it more shiny and elastic and we close our cappuccino or macchiato!
5. Latte Art
LatteArt is not just the beautiful drawing on the cappuccino, or as the word itself says, real art.
It is a frothing and pouring technique that includes a different way to enjoy an excellent cappuccino!
In fact, it provides a frame of coffee along the edges of the cup, with the milk froth on the surface that has clear and contrasting edges.
In this way, when you drink a cappuccino, bringing and tilting the cup towards your mouth, the coffee and the milky part mix in your mouth, creating a perfect balance of taste.
Indeed the LatteArt is not for all customers, but only for those who prefer a cappuccino with a less thick milk froth and who are ready to taste new variations of the traditional Italian drink.
Let’s briefly look at the differences in points:
- The Emulsion Phase should allow for the creation of a shiny, firm and more elastic cream than that required for traditional cappuccino.
- Before starting the pour, the cream must be “broken”, i.e. half the milk and the cream must be poured into another milk jug.
- The cup must be held, if you are right-handed, keeping the handle towards our body.
- The milk jug should be held like a pen, to increase accuracy and fluidity in drawing.
- And the pouring follows precise steps: first the coffee cream is broken up and the brown base canvas is created, after which the design is created until the milk reaches the edge of the cup.


